Generate an App With AI
With Smartoo, you can generate a fully functional business app just by describing what you need, no coding required.
Here, you'll learn how to build your first app using the Smartoo AI Assistant.
Step 1: Writing A Prompt For Your App
From the Smartoo dashboard, click on the message field and type in your best description of the app you want to make, and press Enter/Return.
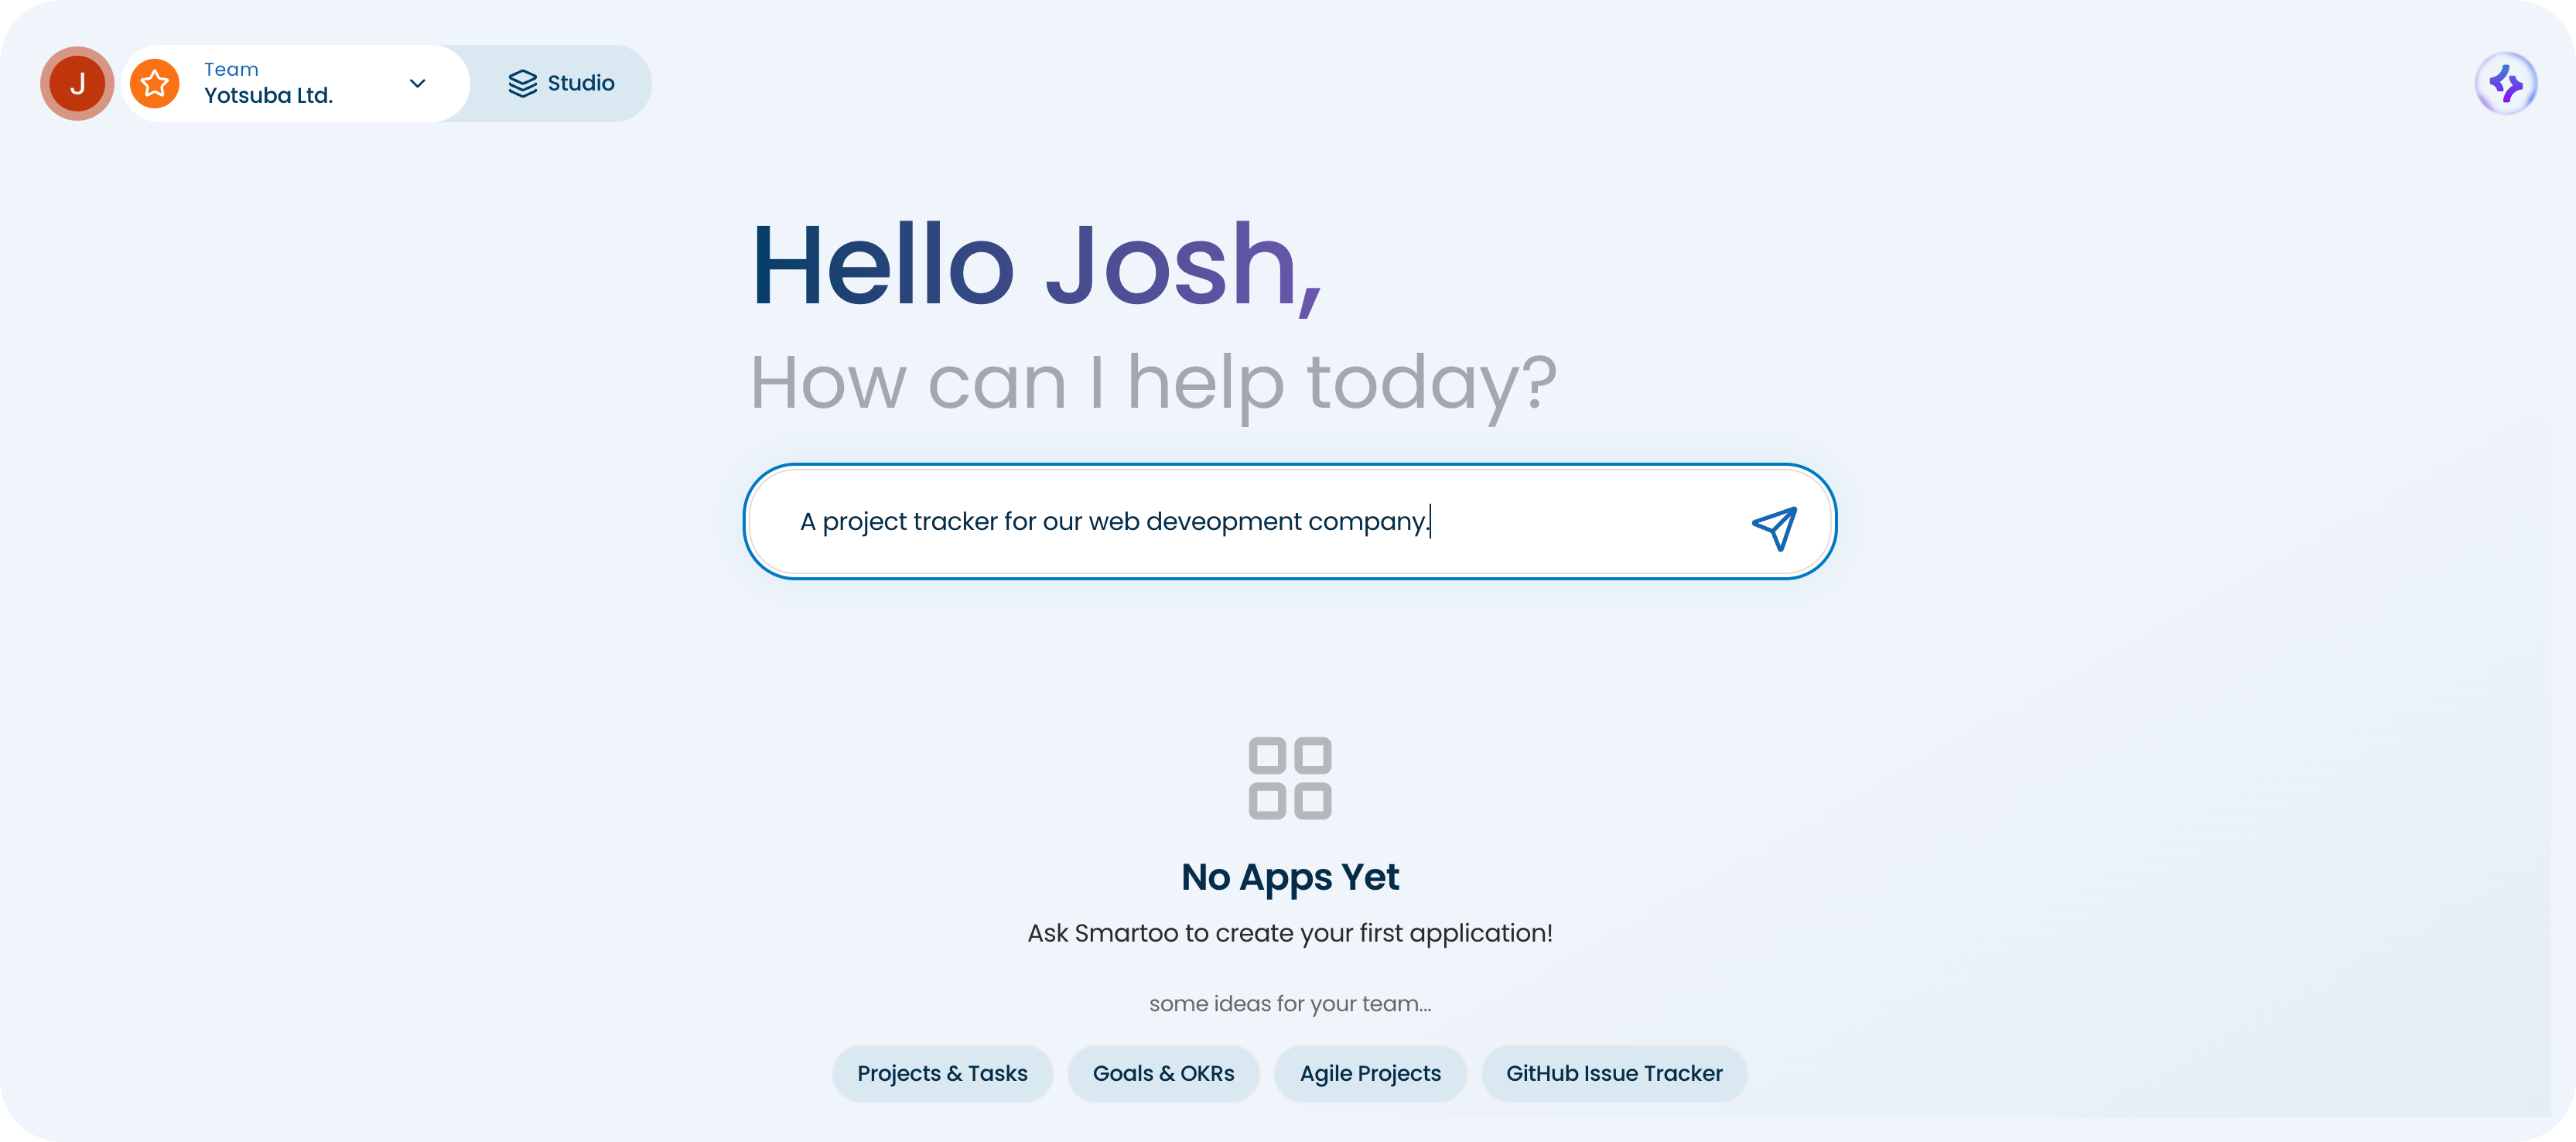
Here are some examples to inspire you:
“Create a content calendar app for a social media team to manage post drafts, approval statuses, and publishing dates.”
“I need an issue tracking system to log software bugs, assign severity levels, and track resolution progress across different product versions.”
"Create an employee portal that houses a centralized employee directory, processes leave requests, and logs annual performance evaluations."
“Build an employee onboarding portal to track required paperwork, training modules completed, and IT equipment assigned.”
Step 2: Choose Your App Features
The Smartoo AI Assistant understands your request and will produce features for you to choose. Review and select the ones you want to include in your app.
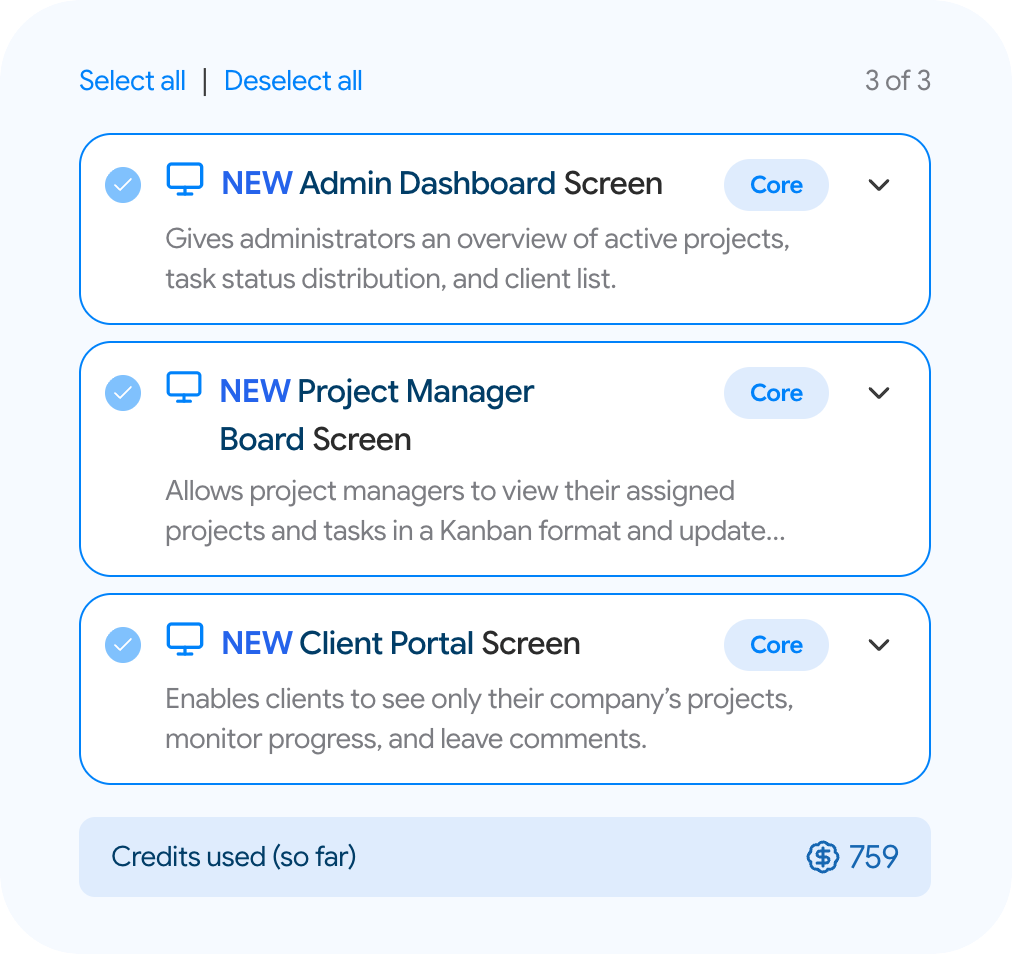
Tip: After building your first app, the AI assistant might ask if you want to reuse existing data tables. Doing so is a great way to keep your data consistent across your various apps.
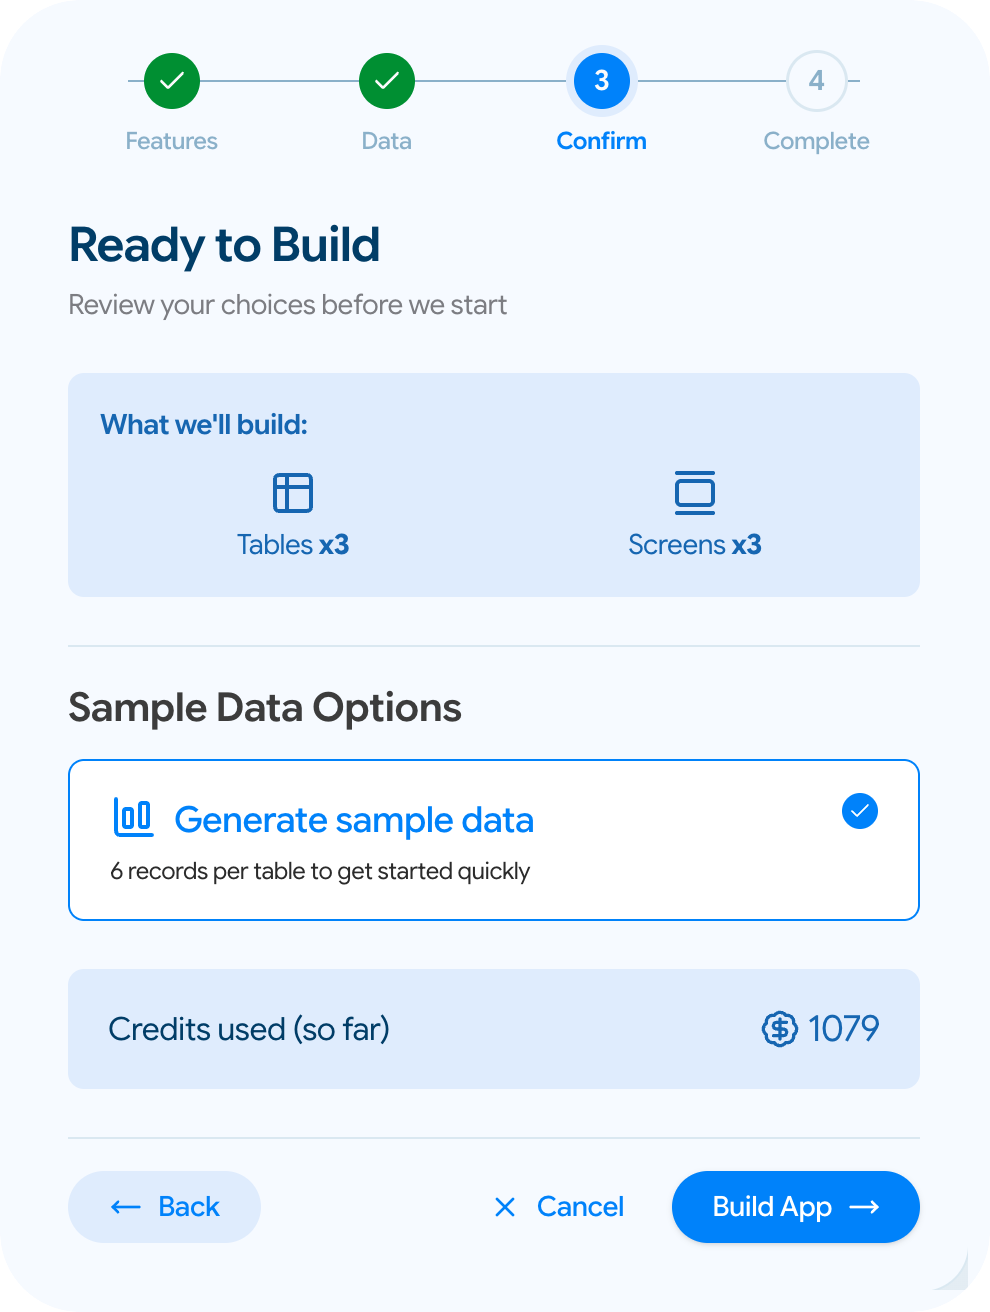
Step 3: Review and Build
The assistant will double-check if you're ready to move forward. Review the details, and once you confirm, the AI will get to work generating your app.
Step 4: Customize Your App's Layout and Widgets
Once the app is built, you’ll be able to see it on the left-hand side of your screen.
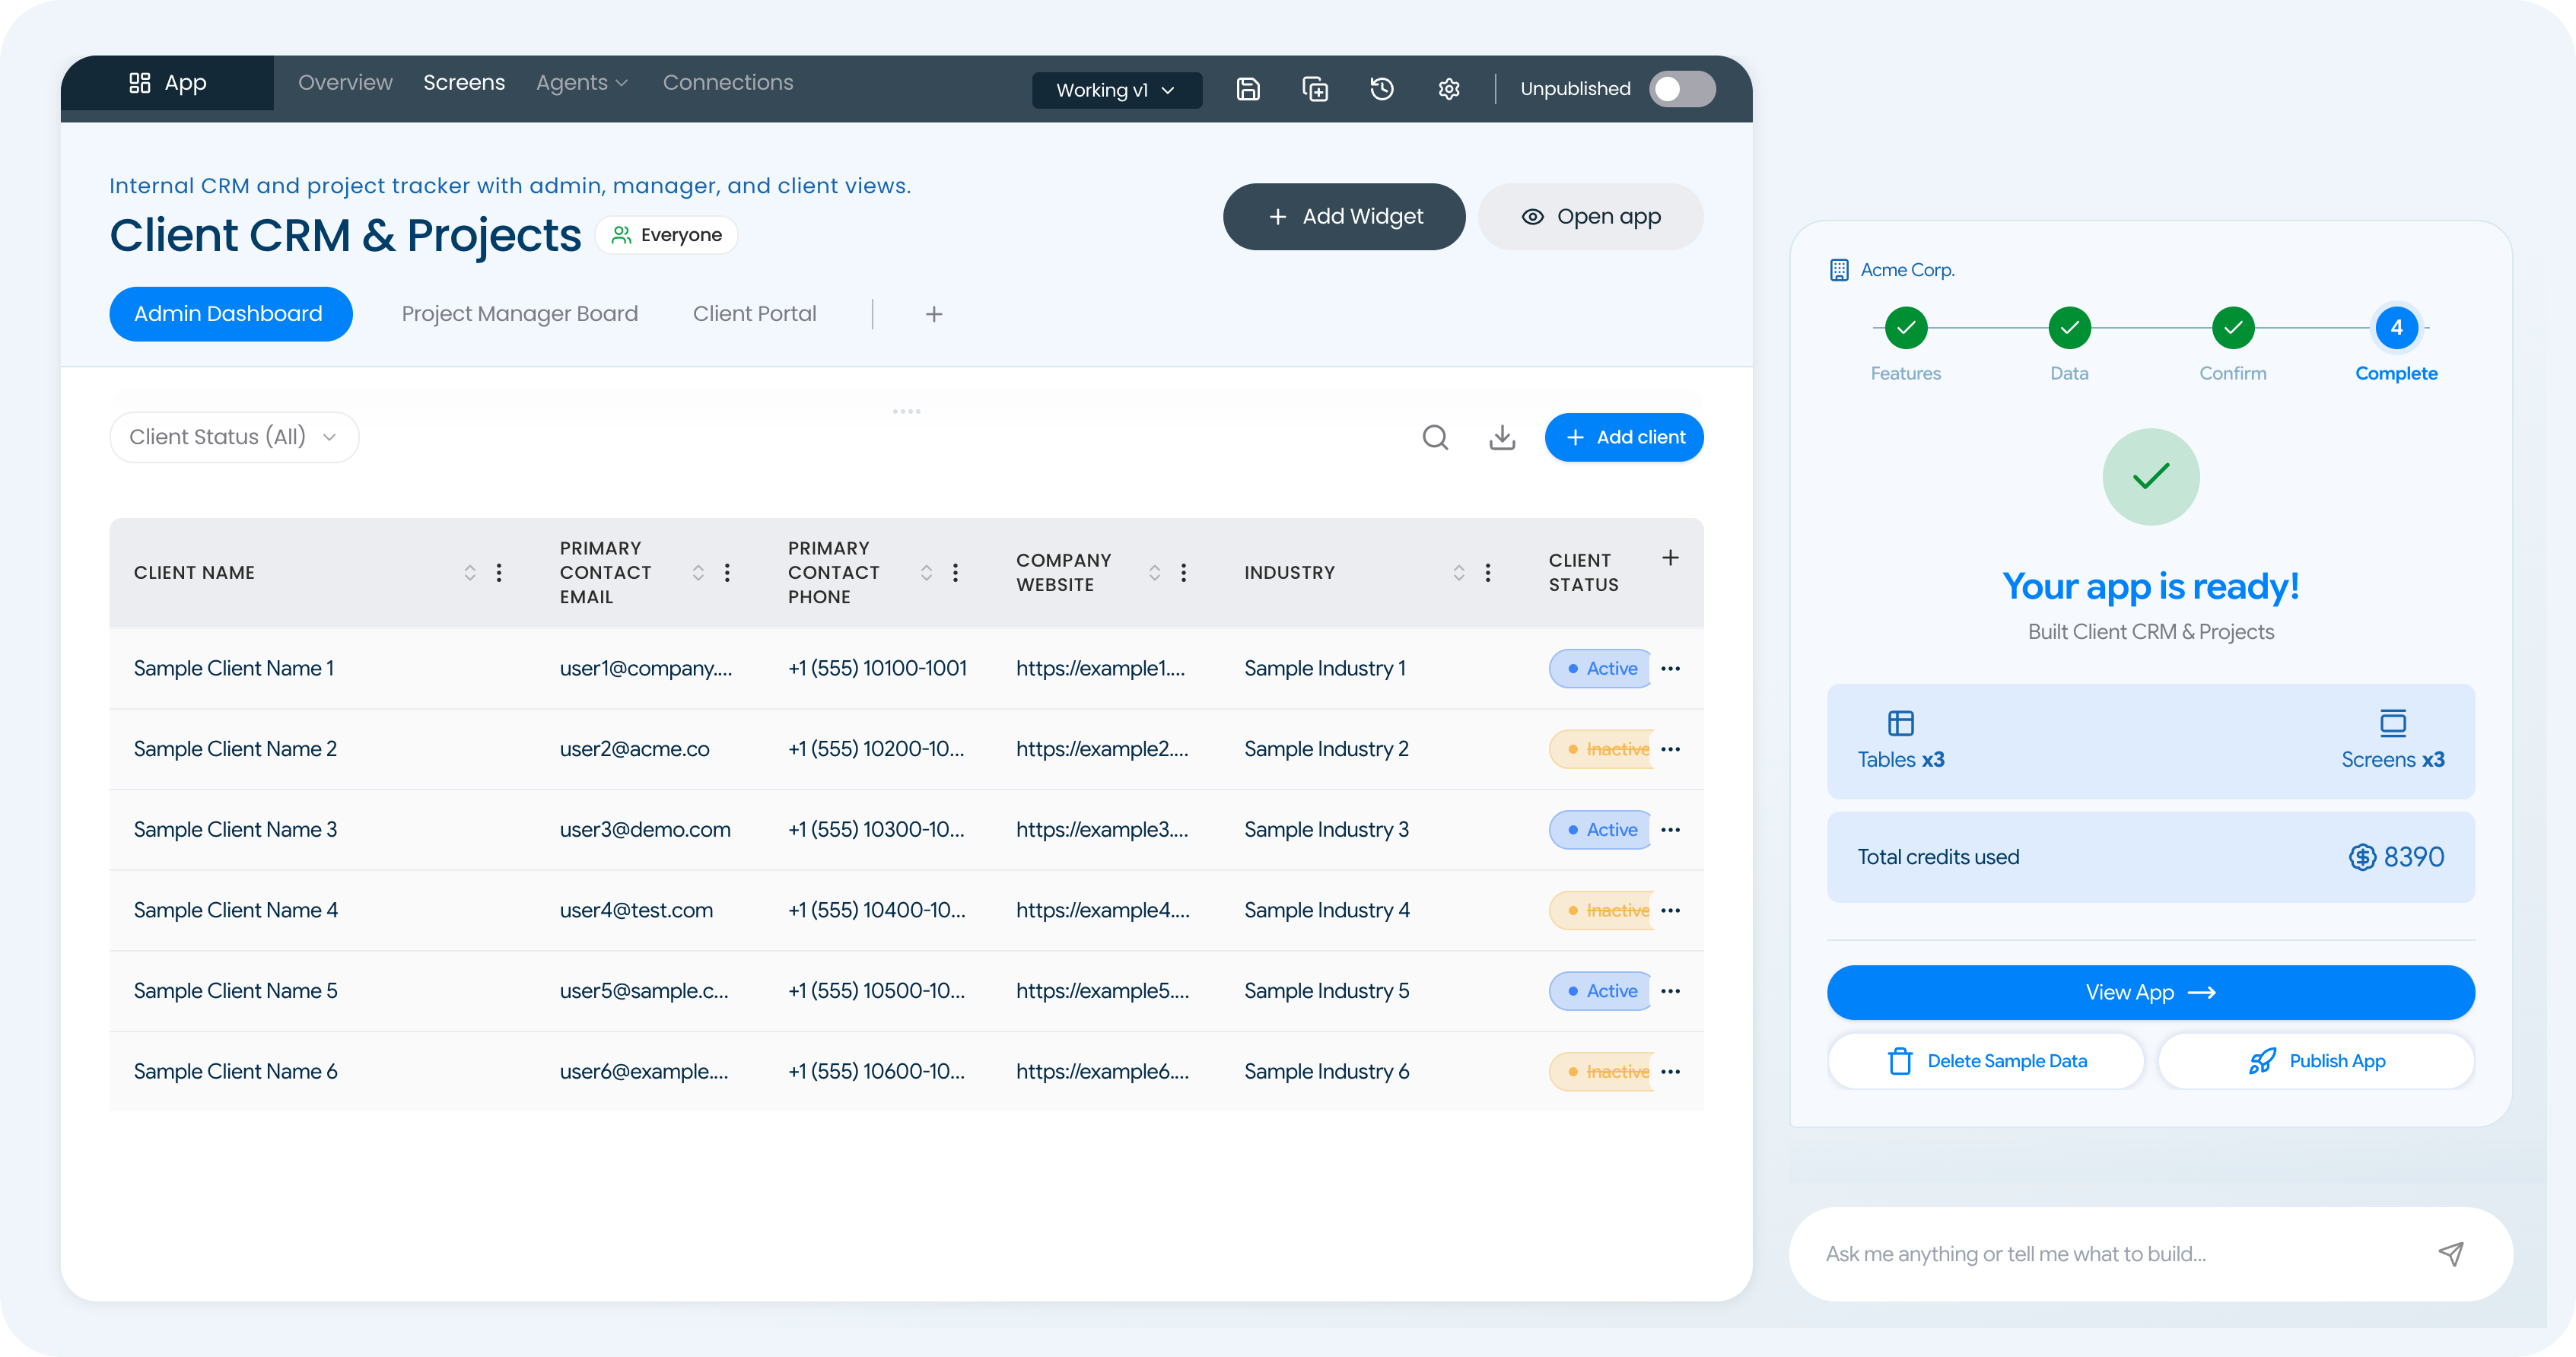
Browse through various tabs located on the top-right to view its Overview, Screens, Agents, and Connections.
- Overview: A dashboard containing summaries of your screens, agents, data tables, and connections.
- Screens: The make-up of your app. Here you can view and manage all your screens (tabs), widgets, roles & permissions, and screen settings.
- Agents: Where you can manage all your workflows and AI Agents.
- Connections: External services that integrate with your apps.
To start customizing, head over to the Screens tab and follow these steps:
Edit Widgets: Hover over widgets and click Edit Widget.
Add Widgets: Click the + Add Widget button at top-right.
Delete Widgets: Hover over widgets and click the Delete widget button at the far right.